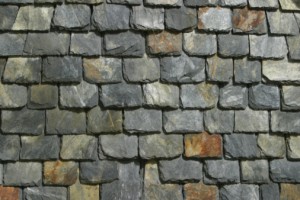
Hand-Split Slate: Load It Carefully, Enjoy It Forever
January 29, 2013 12:29 pmWhy go with a hand-split slate load for your roof, when you can easily find a pile of asphalt tiles from any old roofing company? There are plenty of reasons, and you may already be familiar with some:
- Slate roofing is the most durable, longest-lasting roofing there is (it can last for well over a century).
- Slate tile roofing is easy to maintain
- It’s is one of the most environmentally friendly roofing materials there is–if not the most.
- Slate tile is the most beautiful type of roofing you can put on your house!
What all is involved in putting slate tile on your rooftop? It’s not complicated, but it’s not as easy as installing asphalt or other composite tiling, either. Slate must be handled carefully to avoid expensive breakage, then set properly to ensure it looks good and won’t hang to heavy on your frame.
Here is a peek into the life of a roofer when it comes to slate roofing in Oklahoma City.
The Right Tools for the Job
Installing a hand-split slate load onto your roof involves the regular cast of roofing tools, as well as a few specialty tools specific to slate tile. These tools include:
- Slate cutter (with a long, handled blade–similar to a paper cutter)
- Slate hammer (useful for the obvious, as well as for punching holes in, and even trimming/cutting the tiles)
- Slate ripper (useful for taking out a tile, even when it has been overlaid with another one)
- Roof jacks (to create a safer workspace on your roof)
- Standard roofing tools such as chalk line, utility knife, nail belt, and various ladders
- A ladder hook for steep roofs
Laying Down Your Hand-Split Slate Load
Before the slate is laid down, it can be a good idea to put down 30 lb roofing felt paper. While your slate roof ultimately will be sturdy and well-insulated enough not to need it, it will help protect your home should it rain before the roof is done. It will also add an extra bit of insulation to your roof that, combined with your tiles, will give you the best-insulated tiling job that it is possible to have.

Before a roofer lays down the entire roof, he will typically need to lay down a “starter row” of tile. This is the row of tile at the bottom edge of your roof. These tiles are normally cut shorter than tiles on the rest of the roof (expect maybe for the finishing tiles at the very top).
Hammering in the tiles is not as difficult as you might think. Slate tiles will make it to your home with holes already drilled or punched and ready for nails. These holes are recessed in order to let the nail head rest flush with the tiling, although it takes the finesse of an experienced roofer not to break the tiling on those last blows with the hammer!
From there, each layer of tiling must overlap the other layer just enough to provide good coverage, but not so much that it ads extra weight to the roof (and extra expense to the job!).
How much tiling is appropriate for a roof? That partially depends on what size tiles you’re using, and partially on the build of your house.
A load of 98 12″x24″ tiles can cover the same area as a a load of 686 6″x10″ tiles, for example, and with reduced labor costs and nailing. The down-side is that they are also easier to break, and tend to require a professional hand.
It’s also good to have a professional roofer appraise the build of your house, to make sure your home can handle the weight of slate roofing in OKC. Older houses are sometimes more suited to handle the load, but ultimately it depends in each individual home. It’s best of consult with a professional who can tell you for sure.


